🧰 VRC Unity Toolbar
This package adds additional buttons to the Unity Editor’s Toolbar and Menu bar that removes the need to perform various frequent actions done when building avatars and worlds in VR Chat.
It also provides various automatic bulk functions via the Tools menu and quick installers and update management for some non-VCC packages, such as the Mochie Shader.
Features:
- Selection Navigation
- Smart Duplication
- Focus Scene View
- Auto-Select Avatar
- Auto-Select Gesture Manager
- Change UI Component Fonts
- Store Animations in Animators
- Generate Materials From Textures
- Bulk Update a Material Property
- Quick Installers - Updated
More functions may be added over time.
Compatibility
This package has been tested with Unity 2022.3.22f and the VRChat SDK 3.10.1.
It should function in projects both using and not using the VRChat Creator Companion.
Important Note about Updating
If you previously installed an older version (1.x.x) of this package, it is recommended you first delete the entry for the repository within your User Packages if you added it to the VCC that way, before using the new Community Repository installation method below.
You can do this by, within the VCC, going to Settings > Packages, scrolling to the bottom and clicking the (-) (Remove) button beside the com.nidonocu.vrcunitytoolbar-1.x.x entry under User Packages.
Updates to this package will be automatically installable via the VCC using this new Community Repository feature.
Installing
The most easy way to install this package’s listing to the VRChat Creator Companion using the Community Repository feature.
Automatic Community Repository - (Recommended)
- Click the big Add Package Listing button below if you’re viewing this on the website or navigate to the Virtual Gryphon Packages page.
- Click the Add to VCC button at the package listing website.
- If prompted by your web-browser, click Open on the pop-up confirmation that appears.
- In the VRChat Creator Companion, a confirmation dialog will have appeared. Click I Understand, Add Repository.
- Make sure the checkbox next to the new Virtual Gryphon Packages entry is checked.
Now you can install this package in to any project by doing the following:
- Click the Manage Project project button for your project in the VRChat Creator Companion.
- Make sure in the Selected Repos drop-down in the top right of the window, Virtual Gryphon Packages is enabled.
- Scroll down the packages and find VRC Unity Toolbar, click the (+) (Add) button.
- Open your project and the package will be installed.
Manual Local Package Installation (Not Recommended)
This is the old method of adding this package to the VCC prior to the release of the Community Repository feature. Using this method you can load this package as a User Package so you can then install it in any of your projects, but it will not be automatically updated.
- Download the ZIP version of the package using the buttons below if you’re viewing this on the website or from the releases page.
- Extract this ZIP file to a long term storage location where you keep other downloaded tools. This should be named
vrc-unity-toolbar. - In the VRChat Creator Companion, go to the Settings page.
- Under User Packages, click Add.
- Navigate into the folder containing the package files (
vrc-unity-toolbar) and then click Select Folder.
Once added, you can then install this package on to any project:
- Click the Manage Project project button for your project in the VRChat Creator Companion.
- Make sure in the Selected Repos drop-down in the top right of the window, Local User Packages is enabled.
- Scroll down the packages and find VRC Unity Toolbar, click the (+) (Add) button.
- Open your project and the package will be installed.
Manual Standard Unity Package
If you are not using the VRChat Creator Companion in a classic project, you can load this package from a file. This will not be able to automatically update and you should get your project updated to use the VCC as soon as possible!
- Download the Unitypackage version of the package using the buttons below if you’re viewing this on the website or from the releases page.
- Open your project in Unity.
- From the Assets menu, choose Import Package and then Custom Package.
- Find the Unitypackage file you downloaded (
com.nidonocu.vrcunitytoolbar-3.0.0.unitypackagefor example), select it and the click Open. - Ensure all items are selected and then click the Import button to complete the Install.
How to Use
The package once installed, will add additional buttons to the Unity Toolbar found at the top of the editor.
Located to the right of the toolbox, you can find the following buttons.
Selection Navigation
These buttons act much like the back and forward buttons on your web browser and let you move to a previously selected item without undoing changes like the built in Undo function
This includes both Objects within the current Scene and Assets within your Asset Library.
The navigation buttons will remember up to 100 navigation changes, including when testing in Play mode. Unlike previous versions, these will now also be preserved whenever you enter or leave Play mode, or recompile any scripts within the project.
To move back to a previous selection state, click the Back button. Once you have navigated backward, you can navigate forward again in your selection history by clicking the Forward button.
Selecting something new will always clear the Forward history, similar to how making a change after Undoing clears the ability to ‘Redo’.
If you navigate back to an Object or Asset which no longer exists because it has been deleted or you have loaded a different scene, the current selection will just be set to nothing.
Smart Duplication
Smart duplication performs the same action as the built in Unity Duplicate function, but with several changes that then save on follow up actions:
Smart Duplicates within a Scene will always appear directly under the original object in the hierarchy (or under other duplicates if multiple duplicates are made), rather than at the bottom of the sibling list.
Smart Duplicates will automatically identify and continue a numbering scheme if one is found within the original object. For example, if you name a lighting GameObject Light 1 - Spot, then smart duplicate it, it will be named Light 2 - Spot rather than the Unity default name Light 1 - Spot (1).
Any existing leading zeroes if detected will also be duplicated, so Probe 01 will be duplicated as Probe 02 for example.
Only the first number in the name will be replaced so an object named Part 1 - Zone 2 will be duplicated as Part 2 - Zone 2.
If an object has no existing number, then a number will be assigned based on numbering preferences that you can configure.
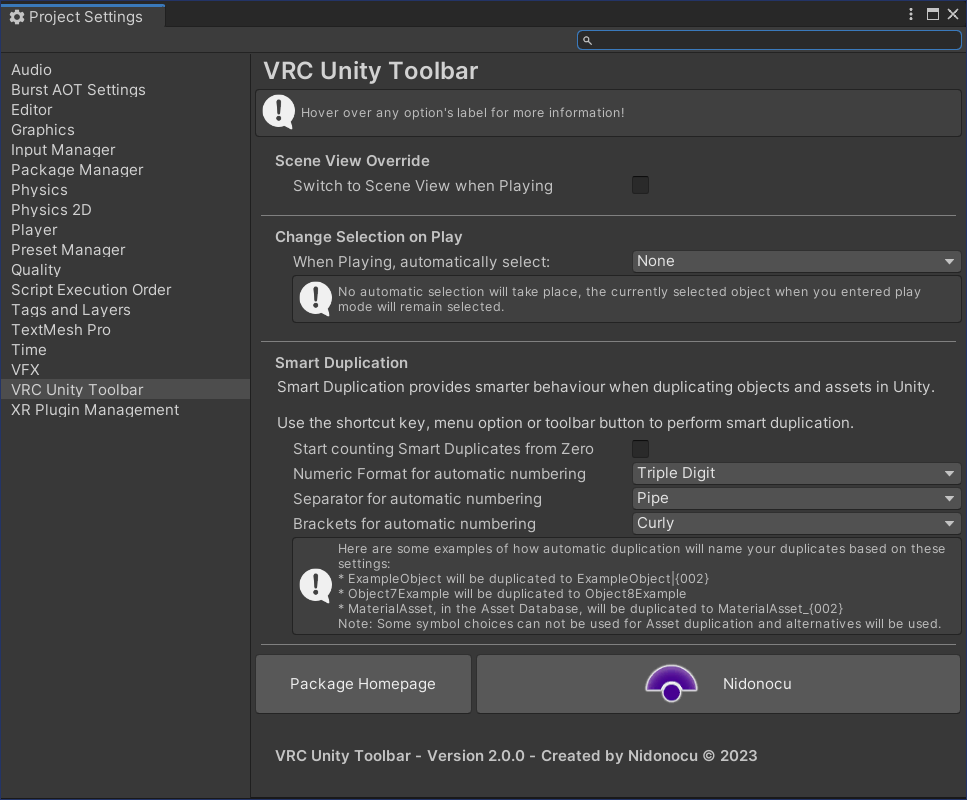
You can access the configuration under Project Settings by going to the Edit menu and then Project Settings and then choosing VRC Unity Toolbar in the category list on the left.
Here you can find settings for the other features of the toolbar, along with the configuration settings for automatic numbering, and links to the project and developer’s websites.
You can choose if you prefer numbers to start 1 or 2, depending on if you prefer zero or one based indexes for your objects in a scene.
You can choose the number of digits (and thus leading zeroes) for numbering. So for example, 1, 01 or 001 (to emulate numbering similar to that found in Blender).
You can choose to surround the number with different styles of brackets, either none, () (similar to the Unity default duplication system), [], {} or <>.
You can choose a separator between the base name and the appended number, either no separator, a space, a pipe |, a dash -, a dot ., an underscore _, a dash with spaces -, or a pipe with spaces |.
⚠ Note: Not all of these symbols are supported by computer filesystems so if you Smart Duplicate an asset in the Asset Database, some alternative symbols will be used. The Pipe Symbol | will be replaced with an Underscore _, a spaced pipe | with a spaced dash - and angular brackets <> with square brackets [].
Located to the right of the Play and Pause buttons you can find the following toggle buttons.
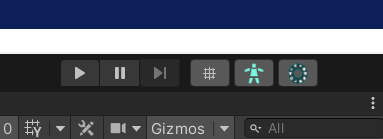
Focus Scene View
When activated, this will switch the active window back to the Scene View after hitting the Play button rather than the Game View.
This is useful, for example, if needing to test an Avatar and you need access to things such as the move gizmo for shaking the avatar to test its Physbones.
Auto-Select Avatar
When activated, this will switch the currently selected item to the object containing the Avatar Descriptor component after hitting the Play button.
This is useful when using something such as Lyuma Avatar 3.0 Emulator and needing to select the avatar to access the menu testing buttons, other emulator functions or for grabbing the avatar’s gizmo to test its physbone movement.
After exiting Play mode, the selection will be automatically restored to the previous item you had selected when you pressed Play. If you turn off this feature while in Play mode, the current selection will be retained.
This function will only be available in VRChat Avatar projects.
Auto-Select Gesture Manager
When activated, this will switch the currently selected item to the Gesture Manger control object after hitting the Play button.
This is useful when you want to test an avatar using this package’s emulation features and testing interactivity and the avatar’s menu.
If you have not yet added a Gesture Manager object to the scene and this feature is enabled, a Gesture Manager object will be added for the duration of the testing mode.
Like with Auto-Select Avatar, after exiting Play mode, the selection will be automatically restored to the previous item you had selected when you pressed Play. If you turn off this feature while in Play mode, the current selection will be retained.
This function will only be available in VRChat Avatar projects and obviously, the Gesture Manager package must be installed. This can be done automatically using the VCC.
In the main menu bar, a new menu with various useful functions can be found under Tools menu and then my name, Nidonocu!

The following functions can be found here:
Change UI Component Fonts
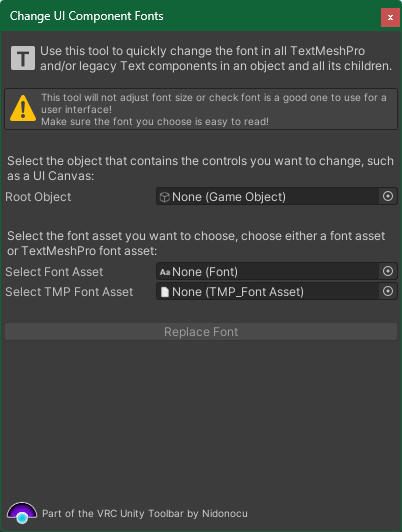
This window can be used to update multiple legacy Text or TextMeshPro components in a Scene with a new font.
Follow the instructions in the window to perform this operation.
You could use this after importing a prefab (such as a video player) and change all of it’s UI to match the same font style as the rest of your world’s user interface.
Make sure to pick a good font!
Store Animations in Animators
This menu option opens a tutorial window to for a reminder of how to use this feature. Here’s how it works:
1. First, create your animator controller and setup all the possible layers and states you want for your controller.
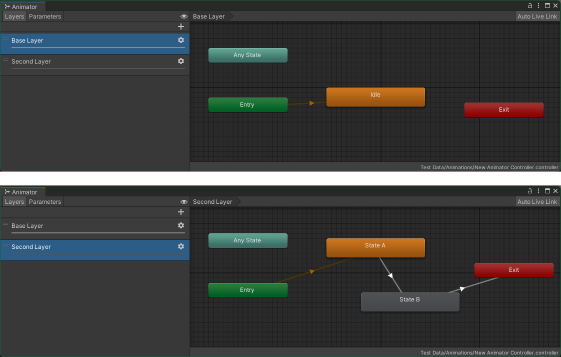
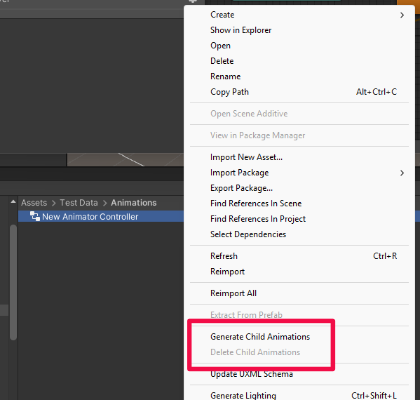
2. Next, in the Project window, right-click the Animation Controller and click the new Generate Child Animations menu option.
3. After a confirmation prompt, the animations will be generated in the animator, click the fold-out arrow to the side of the animator file to access the child animations.
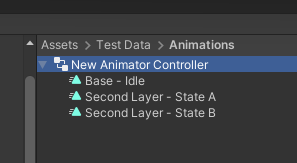
You can add more animations at any time by repeating the above steps.
Important Note: You cannot remove individual animation assets once they have been created at this time, you can only delete all animations at once by choosing the Delete Child Animations option instead on the Animator’s context menu.
Generate Materials From Textures
This menu option lets you quickly create a set of materials from a set of texture files, using another material as a template.
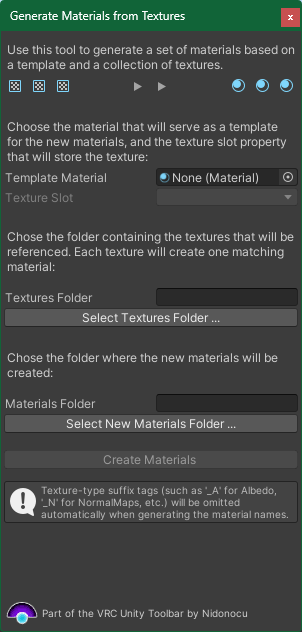
Follow the instructions in the window to perform this operation.
This feature might be useful if you quickly want to import a lot of images in to your project and not have to setup materials for each one that will be identical, such as say, a photo gallery.
Bulk Update a Material Property
This menu option lets you find all materials using a given shader and optionally, with a given value in one of the material’s properties.
Once found, you can then change any other property on all those materials at once, rather than needing to find them spread out throughout your project files and updating each of them.
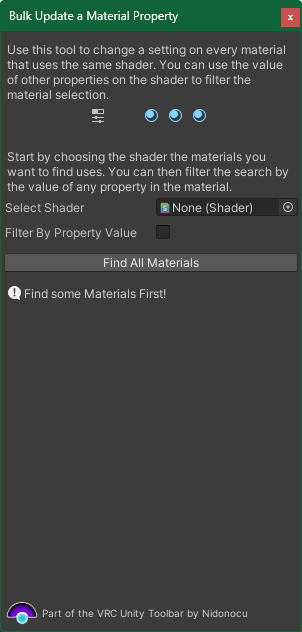
Follow the instructions in the window to perform this operation.
This feature is useful if you need to, late in your project, change a setting on many materials at once because of some project wide change.
Quick Installers
The Quick Installers menu lets you quickly install a number of other packages by other developers. Currently this is just the Hierarchy Icons Unity editor package, and the Mochie shader pack (free edition).
Hierarchy Icons
This package updates your Hierarchy window to render icons to help you identify at a glance what is each object is in your Scene.
![]()
Choose this option from the Quick Installers menu and the package will be automatically installed from it’s GitHub Repo. (You will need to have a Git client installed on your system for this to work.)
Mochie Shaders (Free)
This is a nice pack of good shaders for world use offering a nice selection of features without heavily increasing the download size for your world or avatar.

As this shader pack is not distributed via the VCC or a manifest controlled repository, this tool will handle automatically checking the Shader pack’s GitHub Repo for updates and notify you when a new version is available. It will then automatically download the release’s Unity Package and help you import the update.
It can also be used to perform the initial install of the shader pack as well, all these options can be accessed from the Quick Installers menu.
If you don’t want automatic updates for the shader pack enabled, you can turn them off under Edit > Project Settings > VRC Unity Toolbar and checking Don’t check for Mochie Shader updates.
Automatic checks for updates will only occur by default if you have the shader pack installed. If you already have the shader pack installed after installing the 3.1.0 update, you will be prompted to do an update to record the current version to your settings file and ensure you are up to date.
パッケージ名
com.nidonocu.vrcunitytoolbar
ドキュメント
https://nidonocu.github.io/vrc-unity-toolbar/
リポジトリ
- Virtual Gryphon Packages (20 バージョン)
バージョン
3.1.3 (変更履歴)
Unityバージョン
2022.3 以降
依存関係
なし
VPM依存関係
旧パッケージ
なし